REVIEW · BANFF NATIONAL PARK
Columbia Icefield: Guided Glacier Hike
Book on GetYourGuide →Operated by Icewalks · Bookable on GetYourGuide
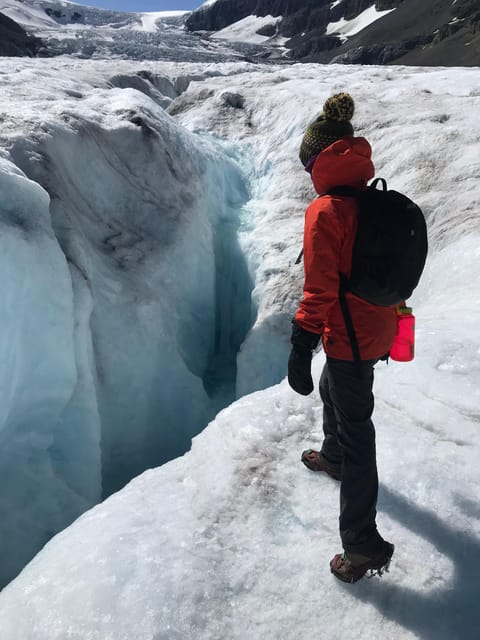
That first step onto glacier ice feels unreal. This guided hike on the Athabasca Glacier puts you up close to crevasses, meltwater, and the kind of Rockies views that make the miles feel worth it. I especially liked how the guides use their time to keep things both safe and easy to understand, with an interpretive program as you walk.
What I really love is the chance to see glacier features up close: deep crevasses, mill wells where water disappears into the ice, and meltwater streams you can watch moving under pressure. The second big win is the gear setup. You’re not guessing what to wear or how to handle slippery ice, because micro-spikes, poles, boots, gloves, and rain gear are all part of the experience.
The one drawback to plan around is physical effort and altitude. You’ll cover about 5 km roundtrip with a 200 m climb at roughly 2000 m elevation, and some people feel short of breath.
In This Review
- Key points before you go
- Price and value: why $96 can still feel worth it
- Getting there: the Icefield Information Centre meeting setup
- The 3-hour flow: what happens from meet-up to return
- Gear that matters on ice: micro-spikes and clothing
- The Athabasca Glacier route: 5 km of crevasses, icefalls, and meltwater
- What you’ll see (and why it’s cool)
- Views you can’t fake
- The pace and “moderate” difficulty
- Guides in action: what makes the explanations click
- Elevation and fitness: who should (and shouldn’t) plan on this
- Weather reality: rain gear is included, but you still need layers
- Should you book the Columbia Icefield Guided Glacier Hike?
- FAQ
- How long is the Columbia Icefield guided glacier hike?
- How far do you walk, and is there elevation gain?
- Where is the meeting point?
- What gear is included in the tour price?
- Do I need technical climbing experience?
- What should I bring?
Key points before you go
You walk onto the Athabasca Glacier as part of the Columbia Icefield Area, not just a lookout stop.
Crampon-style traction is included via micro-spikes for added grip on icy footing.
Crevasse safety is the whole game thanks to an ACMG-certified guide and guided route choices.
You learn as you hike with an interpretive program about what you’re seeing on the ice.
Expect real glacier texture like meltwater streams, icefalls seen from a safe distance, and mill wells.
Moderate but not easy: it’s a 5 km walk with 200 m elevation gain on ice country terrain.
Price and value: why $96 can still feel worth it
At $96 per person for about 3 hours, this isn’t the cheapest way to experience the Columbia Icefield. But the value is in what you actually get: guided glacier walking with safety equipment and a route that takes you onto the ice itself.
Here’s what makes the price make sense. You’re paying for:
- A guide (ACMG-certified) focused on route safety around crevasses
- Micro-spikes for traction, plus boots/poles and weather gear like rain protection
- A shuttle from the meeting point to the trailhead so you’re not trying to “DIY” logistics
- Time on the glacier with interpretation, not just a photo stop
If you’re comparing it to a faster drive-up viewpoint, the difference is simple: a guided hike gives you contact with the environment. You feel the slope under your boots. You hear the guide explain what crevasses and meltwater are telling you. That’s a different experience than standing behind a barrier and looking in one direction.
You can also read our reviews of more tours and experiences in Banff National Park.


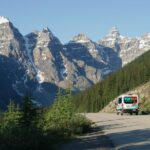
Getting there: the Icefield Information Centre meeting setup
Your start is at the Icefield Information Centre and Glacier Gallery parking lot, on the north side of Highway 93 (opposite the glacier). When you turn in from HWY 93, you’re looking for a black trailer and white vans with the IceWalks logo at the T-junction between the overflow RV parking and the visitor parking.
A couple of practical tips that save stress:
- Do not go into the building.
- Do not park in the Glacier View Hotel parking lot.
Once everyone meets, you get shuttled a short distance to the trailhead. It’s one less variable before you’re gearing up for icy ground.
The 3-hour flow: what happens from meet-up to return

Most of the day’s work happens in a steady, guided rhythm: gear up, move to the glacier, hike the route, and then return to the meeting area.
Here’s the shape of the hike based on what’s built into the experience:
1) Meet and gear up
You’ll have a guide with your group at the designated parking area. Then you get the traction gear and the rest of what you need for comfort—micro-spikes plus items like rain gear and hiking poles. If you don’t have your own hiking boots and gloves, this is one of the places where you can borrow them and keep going.
2) Short shuttle to the trailhead
Instead of a long transfer, you’re taken just enough to start the hike in the right spot.
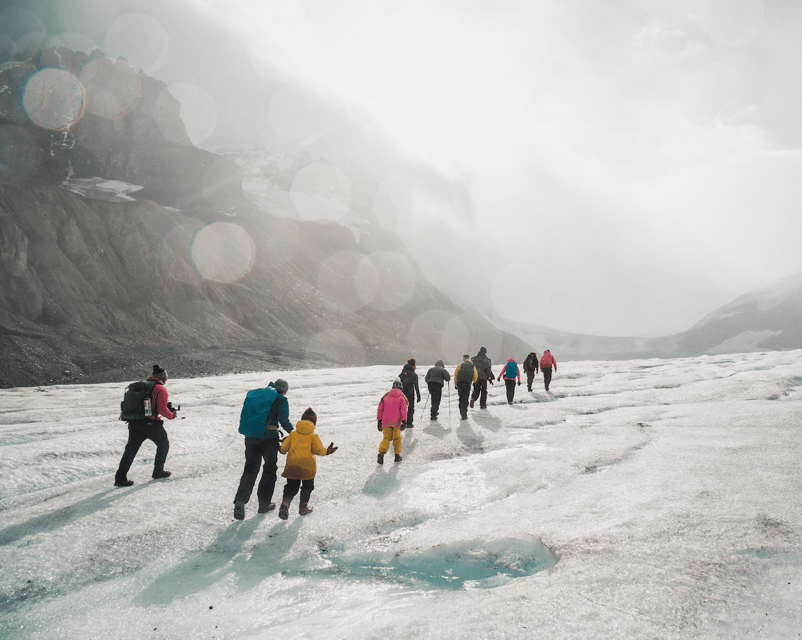
3) Walk the glacier route
This is a moderate tour covering 5 km roundtrip with about 200 m elevation gain. You’ll be on foot, moving from rocky approach terrain onto glacier ice.
4) Safety pauses and feature watching
The guide doesn’t rush the “interesting stuff.” Expect time at points where the guide can show you things like crevasses, mill wells, meltwater streams, and icefalls from a safe distance.
5) Return
After the main route and interpretive stops, you turn back and eventually reconnect with the group’s original pickup area timing.
Gear that matters on ice: micro-spikes and clothing
Glacier walks can feel intimidating until someone hands you the right tools. This tour does that part for you.
Included items typically cover:
- Micro-spikes (crampon-style traction for ice)
- Rain gear
- Hiking poles
- Hiking boots
- Gloves and hats (if you don’t bring your own)
What you should bring from home:
- Snacks
- Thermal clothing
A quick reality check: the tour includes rain gear, but it doesn’t replace the need for warmth. Warm layers like sweaters and pants are not included, so if you tend to get cold, pack extra layers even if the weather looks mild at the start.
One small detail I appreciate about how the guides run the hike: they tend to focus on getting everyone comfortable quickly. Guides like Corin have been described as taking extra care on slippery spots, and that practical attitude matters once the ice changes texture underfoot.
The Athabasca Glacier route: 5 km of crevasses, icefalls, and meltwater
This tour is built around one core thing: walking onto the Athabasca Glacier, a major part of the Columbia Icefield.
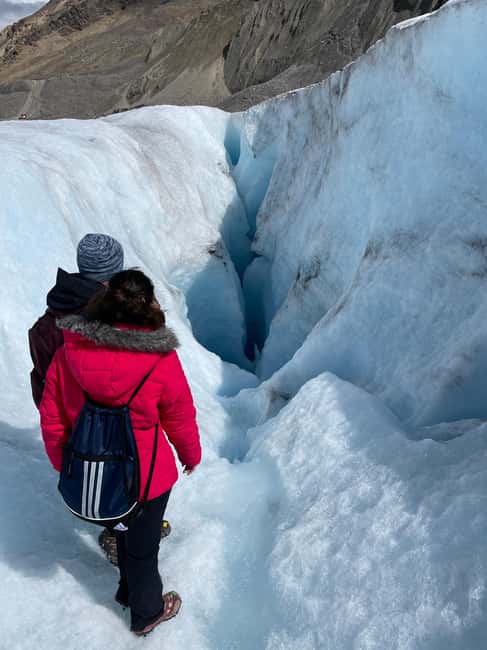
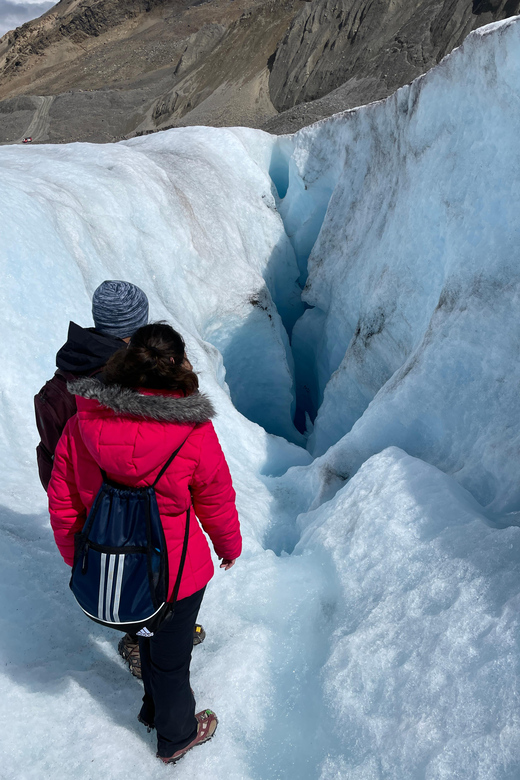
What you’ll see (and why it’s cool)
You’re not just walking across a flat sheet of ice. The glacier has features that look dramatic up close and make more sense when you hear the story behind them.
Expect to encounter:
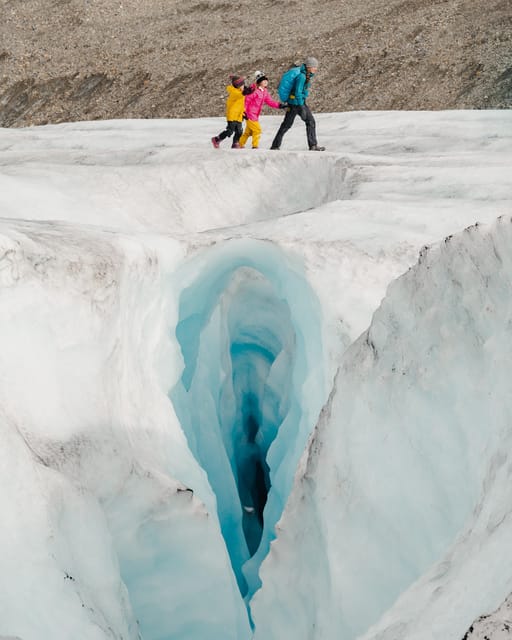
- Crevasses: deep cracks in the ice. The tour is set up so you’re looking from safe positions while still getting a clear sense of scale.
- Mill wells: places where meltwater pours down into the depths of the ice. This is one of those “how does water even do that?” moments.
- Meltwater streams: flowing water channels that show how the glacier is actively changing.
- Icefalls: usually viewed from a safe distance. You’ll get the wow factor without crossing into danger.
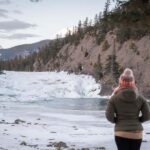
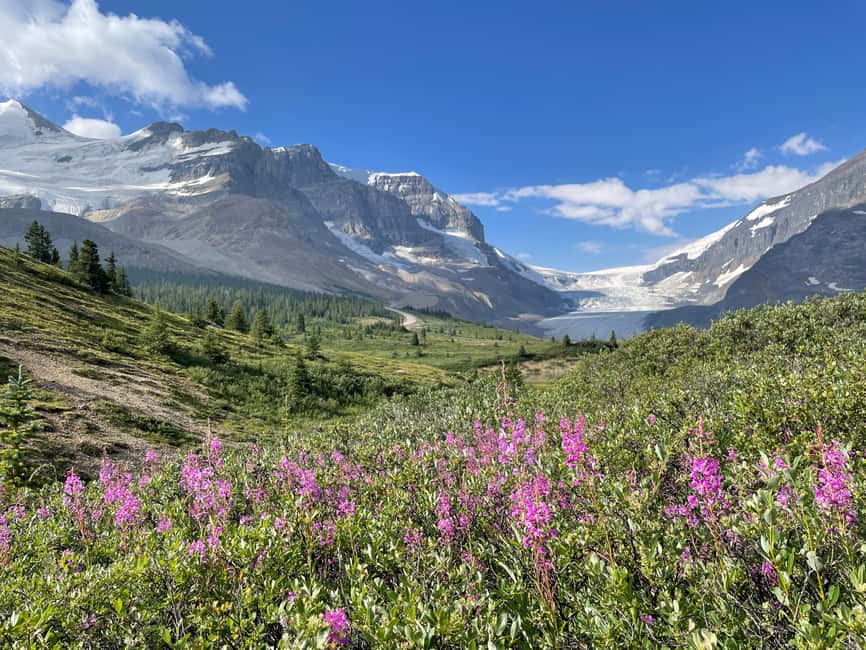
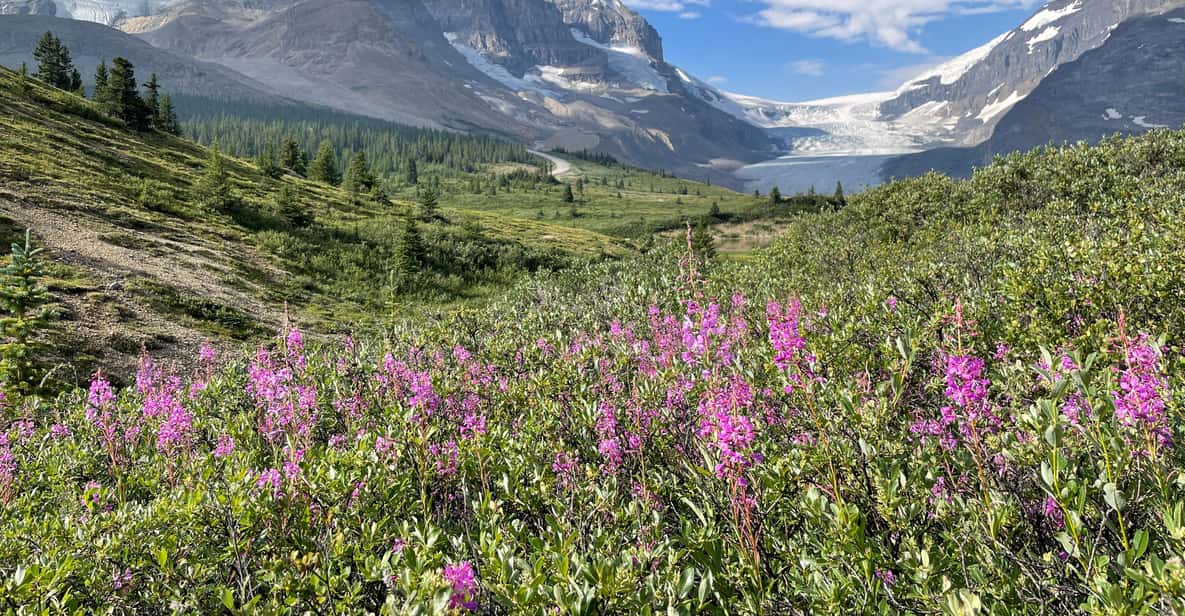
Views you can’t fake
You also get iconic Rockies views—specifically, the chance to see the surrounding high peaks while you’re actually moving on the ice. That combination of motion plus scenery is a big part of why people say they’d do this again.
The pace and “moderate” difficulty
Moderate here doesn’t mean casual. You’ll have traction, but you’ll still be working your legs for 5 km on icy terrain with a 200 m gain.
The guide helps with route choices and safety around tricky spots. If you’ve ever done a hike where footing suddenly changes, you’ll appreciate having someone call out what matters—especially if ice conditions make normal trail habits less reliable.
Guides in action: what makes the explanations click
This tour lives or dies by the guide. Here, you get an ACMG-certified guide whose job is both safety and interpretation.
Names that have come up include Pete, Troy, Stu, Corin, Larry, and Ann. Across different groups, the pattern is the same: the guide keeps the glacier science understandable and ties it to what you’re seeing at that moment.
What that looks like in practice:
- Clear, safety-first guidance around crevasses
- Friendly, energetic teaching that helps you pay attention instead of just snapping photos
- A teaching style that works whether you’re there for the adventure or the learning
You’ll get an interpretive program along the way. That matters because glacier features can look random if nobody explains them. With the guide, you start to connect meltwater movement, cracks, and ice formations into one story about how glaciers behave over time.
Elevation and fitness: who should (and shouldn’t) plan on this
The tour operates at 2000 m, and some people experience shortness of breath due to elevation. This hike is also not framed as a universal walk-in-the-park.
It’s suitable for:
- Young children ages 7–16 who enjoy hiking and active time
- Active seniors who can handle moderate walking and icy footing
It is not suitable for:
- Children under 7
- People with mobility impairments
- Wheelchair users
- People with heart problems
- People with a cold
- People over 75
- People with pre-existing medical conditions
- People with low level of fitness
If any of those apply, it’s smarter to choose a different Columbia Icefield experience that matches your health and comfort level.
Weather reality: rain gear is included, but you still need layers
Mountain weather has a way of changing your mood fast. This tour includes rain gear to help keep you comfortable, which is a big help if clouds roll in.
Still, plan for cold. You’re on ice, often with wind, and you’ll spend the hike on your feet rather than sitting in a vehicle. Bring thermal clothing and pack snacks. If you forget something small, the setup tends to include loaner gear like gloves and hats, but don’t treat that as a substitute for packing thoughtfully.
Should you book the Columbia Icefield Guided Glacier Hike?
Book it if you want:
- To walk onto the Athabasca Glacier and not just look at it
- A guided experience where safety is handled by an ACMG-certified leader
- An active 3-hour outing with interpretation built in
- Traction and gear taken care of for you
Skip or choose another option if:
- You’re sensitive to elevation or you know your fitness level won’t handle 5 km with 200 m gain
- You fall into the listed not-suitable categories (mobility limits, heart issues, pre-existing medical conditions, age over 75, and more)
- You want a low-effort experience with minimal time outdoors
If you’re on the fence between this and the quick drive-and-view style experiences, this is the choice that gets you onto the ice and gives you context while you’re there.
FAQ
How long is the Columbia Icefield guided glacier hike?
The tour runs for about 3 hours.
How far do you walk, and is there elevation gain?
It’s a 5 km roundtrip walk with about 200 m elevation gain.
Where is the meeting point?
Meet at the Icefield Information Centre and Glacier Gallery parking lot, on the north side of Highway 93. Look for a black trailer and white vans with the IceWalks logo at the T-junction between overflow RV parking and visitor parking.
What gear is included in the tour price?
You get a guide plus micro-spikes (traction), rain gear, hiking poles, hiking boots, gloves, and hats if you don’t have your own. Transport from the meeting location to the trailhead is also included.
Do I need technical climbing experience?
No technical climbing experience is required.
What should I bring?
Bring snacks and thermal clothing. Warm layers like sweaters and pants are not included. Also note that the tour operates at 2000 m, and some people feel short of breath due to elevation.